Chocolate Cream Cheese Danish
A Decadent Pastry for Breakfast or Dessert
Introduction: The Art of Danish Pastry
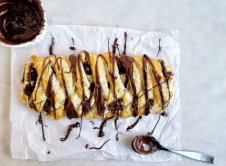
The Chocolate Cream Cheese Danish is a classic pastry that marries the delicate, buttery layers of a traditional Danish with a creamy, tangy cream cheese filling and a rich chocolate touch. This treat is perfect for brunch, a special breakfast, or even as an elegant dessert for guests.
The beauty of this pastry lies in its contrast of textures: the crisp, flaky exterior gives way to a soft, creamy center with the bittersweet richness of chocolate. While it may look impressive, making it at home is very achievable with patience and attention to detail.
This recipe is designed to guide you through the step-by-step process to ensure perfect results.
Ingredients (Makes 8–10 Danishes)
For the dough (Puff Pastry Base)
- 2 ½ cups (315 g) all-purpose flour
- ¼ cup (50 g) sugar
- 1 tsp salt
- 1 cup (225 g) unsalted butter, cold and cubed
- ½ cup (120 ml) cold water
- 1 tsp vanilla extract
- 1 tsp lemon juice
For the cream cheese filling
- 8 oz (225 g) cream cheese, softened
- ¼ cup (50 g) sugar
- 1 tsp vanilla extract
- 1 large egg yolk
- 2 tbsp heavy cream (optional, for extra creaminess)
For the chocolate component
- 3–4 oz (85–115 g) semi-sweet or dark chocolate, chopped
- Alternatively: chocolate chips or a chocolate spread
For the glaze (optional)
- ½ cup (60 g) powdered sugar
- 1–2 tsp milk or cream
- ½ tsp vanilla extract
Equipment Needed
- Rolling pin
- Mixing bowls
- Whisk
- Pastry brush
- Baking sheet
- Parchment paper
- Sharp knife or pizza cutter
- Plastic wrap
Step 1: Prepare the puff pastry dough
- In a large bowl, whisk together the flour, sugar, and salt.
- Add the cold, cubed butter. Using a pastry cutter, two forks, or your fingers, gently incorporate the butter into the flour until the mixture resembles coarse crumbs with some pea-sized butter pieces remaining. This is essential for the puffing process.
- In a separate small bowl, combine cold water, vanilla extract, and lemon juice.
- Gradually add the liquid to the flour-butter mixture, stirring gently with a fork until the dough begins to form.
- Turn the dough onto a lightly floured surface, knead 2–3 times just until it comes together. Avoid over-kneading to prevent a tough pastry.
- Shape the dough into a rectangle, wrap in plastic wrap, and refrigerate for at least 1 hour (or overnight). This allows the butter to firm up for proper lamination.
Step 2: Laminate the dough (creating layers)
- On a floured surface, roll the chilled dough into a rectangle about 12×8 inches.
- Fold the dough in thirds, like a letter (top third over the center, bottom third over the top). This is the first fold.
- Rotate the dough 90 degrees, roll it again to 12×8 inches, and fold in thirds again.
- Repeat this rolling and folding 2 more times, chilling the dough for 20 minutes between folds if it becomes too soft.
- These folds create the distinct layers that make the pastry flaky and airy.
Step 3: Prepare the cream cheese filling
- In a medium bowl, beat together the softened cream cheese, sugar, and vanilla extract until smooth and creamy.
- Add the egg yolk and heavy cream, mix until fully incorporated.
- Transfer the filling to a piping bag or keep it in a bowl for spooning later.
Step 4: Assemble the Danish
- Preheat your oven to 375°F (190°C) and line a baking sheet with parchment paper.
- Roll out the laminated dough to a 12×12 inch square.
- Cut the dough into 4 large squares (or 8 smaller squares for individual servings).
- Place 1–2 tablespoons of cream cheese filling in the center of each square.
- Add a small amount of chopped chocolate or a few chocolate chips on top of the cream cheese.
- Fold the corners or edges of each square over the filling:
- For a classic square Danish, fold the corners to the center, leaving the filling visible.
- Alternatively, roll the dough around the filling for a pocket-style Danish.
Step 5: Egg wash and baking
- In a small bowl, whisk 1 egg with 1 tsp water to make an egg wash.
- Brush the edges of the pastry lightly with the egg wash for a golden, glossy finish.
- Bake in the preheated oven for 20–25 minutes, until the pastry is puffed and golden brown.
- Remove from oven and let cool slightly on a wire rack.
Step 6: Glaze the Danishes (optional)
- In a small bowl, whisk together powdered sugar, milk, and vanilla extract until smooth.
- Drizzle the glaze over the slightly cooled Danishes using a spoon or piping bag.
- The glaze adds a touch of sweetness and an attractive finish.
Tips for Perfect Danish Pastries
- Keep everything cold: Butter should be firm to create layers. Chill dough if it becomes too soft.
- Don’t overfill: Too much filling can leak during baking.
- Even folding: Ensures uniform layers for a crisp, airy pastry.
- Chocolate choice: Semi-sweet chocolate balances the tanginess of cream cheese.
- Serving: Best enjoyed fresh and slightly warm.
Variations
- Fruit Danish: Add fresh berries or fruit preserves on top of cream cheese.
- Nutty chocolate: Sprinkle chopped nuts like almonds or pistachios over chocolate before baking.
- Cinnamon twist: Mix a little cinnamon into the cream cheese filling for added warmth.
- Mini Danishes: Cut the dough into smaller squares for bite-sized pastries perfect for brunch or parties.
Storage
- Room temperature: Store in an airtight container for 1–2 days.
- Refrigerator: Keep in a sealed container for up to 4 days; reheat in the oven for best texture.
- Freezing: Can be frozen unbaked or baked; if freezing unbaked, assemble, freeze, then bake from frozen, adding a few extra minutes to the baking time.
Serving Suggestions
- Serve warm with coffee, hot chocolate, or tea for breakfast.
- Pair with fresh berries or fruit compote for a dessert presentation.
- Sprinkle lightly with powdered sugar for a bakery-style finish.
Conclusion
The Chocolate Cream Cheese Danish is a luxurious yet achievable pastry that combines flaky, buttery layers with rich, creamy, chocolatey goodness. Perfect for special occasions, brunches, or simply indulging yourself, this Danish pastry elevates any table with its flavor, aroma, and visual appeal.
With patience and attention to detail, you can create pastries that rival any bakery, offering a perfect balance of crunch, creaminess, and chocolate decadence. Every bite is a delightful contrast of textures and flavors—crispy, tender, sweet, and slightly tangy all at once.