🐚 How to Make Coral Tuile (Complete Recipe & Guide)
🌟 Introduction
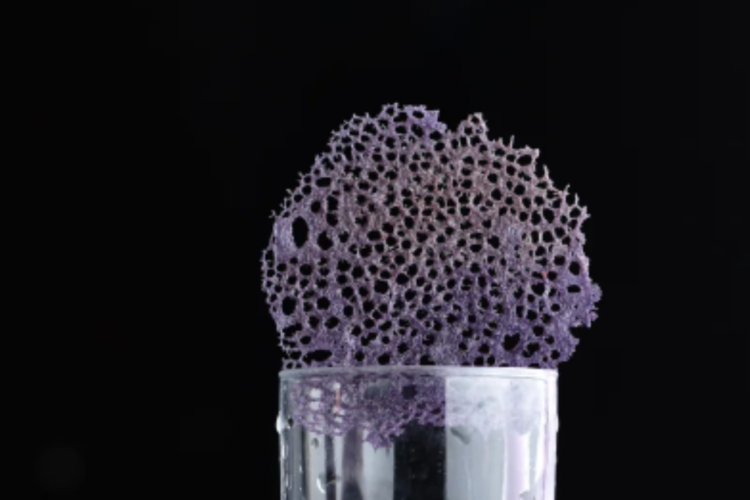
Coral tuile—also known as “lace tuile” or “coral crisp”—is a stunning, delicate garnish often seen in fine dining restaurants. With its airy, lacy structure that resembles ocean coral, this tuile adds both visual elegance and a crisp texture to dishes. It’s especially popular in modern plating, where presentation is just as important as flavor.
Despite its sophisticated appearance, coral tuile is surprisingly simple to make. It requires only a handful of ingredients and a non-stick pan. The magic happens through a reaction between oil and water during cooking, creating those signature holes and intricate patterns.
Whether you’re plating seafood, soups, or gourmet appetizers, mastering coral tuile will instantly elevate your culinary presentation.
🛒 Ingredients
You only need a few basic ingredients:
- 60 ml water
- 60 ml vegetable oil (or neutral oil like sunflower or canola)
- 10 g all-purpose flour
- A pinch of salt
- Optional: food coloring (black, red, green, etc.)
🧰 Equipment Needed
- Non-stick frying pan
- Mixing bowl
- Whisk or fork
- Ladle or spoon
- Spatula or palette knife
- Paper towels
🧪 Understanding the Technique
Before starting, it helps to understand why coral tuile works. The batter is a mixture of water, oil, and flour. When poured into a hot pan, the water evaporates rapidly, creating steam. This steam pushes through the oil, forming bubbles and holes. As the mixture cooks, it solidifies into a crispy structure.
The key to success lies in:
- Proper heat control
- Correct ingredient ratios
- Patience during cooking
🔪 Step-by-Step Instructions
1. Prepare the Batter
In a mixing bowl, combine:
- Water
- Vegetable oil
- Flour
- Salt
Whisk thoroughly until you get a smooth, lump-free liquid. The consistency should be similar to thin cream.
If you want colored tuile, add a few drops of food coloring and mix well.
Let the batter rest for 5 minutes. This helps the flour fully hydrate.
2. Heat the Pan
Place a non-stick pan over medium-high heat. This step is crucial—if the pan is not hot enough, the coral effect won’t form.
To test the heat, flick a drop of water into the pan. It should sizzle immediately.
3. Cook the Coral Tuile
Stir the batter (it separates quickly due to oil and water—this is normal).
Pour a small amount (about 1–2 tablespoons) into the hot pan.
Immediately, you’ll see bubbles forming. This is the signature coral effect developing.
Do not touch or move the mixture while it cooks.
4. Let It Crisp
Allow the tuile to cook undisturbed for about 1–2 minutes. The bubbling will gradually slow down as the water evaporates.
Once the bubbling stops and the tuile looks dry, it’s ready.
The edges should be slightly golden and crisp.
5. Remove and Drain
Carefully lift the tuile from the pan using a spatula.
Place it on paper towels to absorb excess oil.
While still warm, you can shape it gently if desired (for example, draping it over a rolling pin for a curved design).
Let it cool completely—it will become crisp as it cools.
🎨 Presentation Ideas
Coral tuile is incredibly versatile. Here are some ways to use it:
- Garnish for seafood dishes like grilled shrimp or salmon
- Decorative topping for creamy soups
- Accent for risotto or pasta plates
- Fine dining plating for appetizers
You can break it into smaller pieces or use large dramatic shapes depending on your presentation style.
🔄 Variations
1. Colored Coral Tuile
Add food coloring for dramatic plating. Black (using squid ink or charcoal powder) is especially popular in gourmet cuisine.
2. Herb-Infused Version
Blend herbs like parsley or basil into the water before mixing for a natural green color and subtle flavor.
3. Sweet Coral Tuile
Add a pinch of sugar instead of salt and use it as a garnish for desserts.
💡 Tips for Success
- Always stir before pouring: Oil and water separate quickly
- Use a non-stick pan: Prevents sticking and tearing
- Control heat carefully: Too low = no holes, too high = burning
- Don’t overcrowd the pan: Make one tuile at a time for best results
- Work quickly: The batter separates fast
⚠️ Common Mistakes
1. No Coral Effect
Cause: Pan not hot enough
Solution: Increase heat before pouring batter
2. Tuile Too Oily
Cause: Too much oil in batter or insufficient draining
Solution: Stick to measurements and use paper towels
3. Tuile Breaks Easily
Cause: Too thin or undercooked
Solution: Let it cook until bubbling stops completely
🧊 Storage
- Store in an airtight container at room temperature
- Best consumed within 1–2 days
- Keep in a dry place to maintain crispness
Avoid refrigeration, as moisture will soften the tuile.
❤️ Why You’ll Love This Technique
Coral tuile is one of those culinary tricks that delivers maximum impact with minimal ingredients. It’s quick, customizable, and visually stunning. Once you master it, you can transform even simple dishes into restaurant-quality plates.
It’s also a great way to explore modern gastronomy techniques without needing specialized equipment.
🧑🍳 Final Thoughts
Making coral tuile might seem intimidating at first, but after a few tries, it becomes second nature. The key is experimentation—adjust heat, quantities, and timing until you get your perfect lace pattern.
Whether you’re cooking for guests or just want to impress yourself, coral tuile is a fun and creative addition to your kitchen skills.