Mini Pita Pizzas
A fun, fast, and flavorful twist on classic pizza
Introduction
Mini pita pizzas are one of the easiest and most versatile recipes you can make at home. Using pita bread as the base eliminates the need for dough preparation, making this recipe perfect for busy days, beginner cooks, or anyone craving pizza without the long wait. These small, individual pizzas are ideal for kids, gatherings, or even meal prep, and they can be customized endlessly with your favorite toppings.
The crispy edges, soft interior, and melty cheese create the perfect bite every time. Whether you prefer classic flavors or creative combinations, mini pita pizzas deliver satisfaction with minimal effort.
Ingredients
For the Base:
- 6 pita breads (small or medium size)
- 2 tablespoons olive oil
For the Sauce:
- 1 cup pizza sauce (store-bought or homemade)
- 1 teaspoon dried oregano
- 1/2 teaspoon garlic powder
- 1/2 teaspoon salt (optional)
For the Cheese:
- 2 cups shredded mozzarella cheese
- 1/4 cup grated Parmesan cheese
Suggested Toppings:
(Choose your favorites or mix and match)
- Sliced pepperoni
- Cooked chicken pieces
- Sliced mushrooms
- Diced bell peppers
- Red onions (thinly sliced)
- Black olives
- Sweet corn
- Cherry tomatoes
- Fresh basil leaves
Equipment Needed
- Baking tray
- Parchment paper (optional)
- Oven or toaster oven
- Knife and cutting board
Instructions
Step 1: Preheat the Oven
Preheat your oven to 200°C (400°F). A hot oven is essential for achieving crispy pita edges and properly melted cheese.
Line a baking tray with parchment paper for easy cleanup, or lightly grease it with oil.
Step 2: Prepare the Pita Base
Place the pita breads on the baking tray. If the pitas are thick, you can carefully slice them in half horizontally to create thinner bases—this will make them crispier and more similar to traditional pizza crust.
Lightly brush each pita with olive oil. This step helps prevent sogginess and enhances flavor.
Step 3: Prepare the Sauce
In a small bowl, mix the pizza sauce with oregano, garlic powder, and a pinch of salt. This quick seasoning step boosts the flavor and gives your pizzas a more authentic taste.
Step 4: Assemble the Mini Pizzas
Spread 2–3 tablespoons of sauce evenly over each pita, leaving a small border around the edges.
Sprinkle a generous amount of mozzarella cheese over the sauce, followed by a light sprinkle of Parmesan.
Now comes the fun part—add your toppings! Be careful not to overload the pizzas, as too many toppings can make them soggy and prevent even cooking.
Step 5: Bake
Place the tray in the oven and bake for 8–12 minutes, or until the cheese is melted, bubbly, and slightly golden, and the edges of the pita are crisp.
Keep an eye on them during the last few minutes to avoid burning.
Step 6: Cool and Serve
Remove the mini pita pizzas from the oven and let them cool for 2–3 minutes. This allows the cheese to set slightly and makes them easier to handle.
Garnish with fresh basil or a drizzle of olive oil if desired, then serve warm.
Tips for Perfect Mini Pita Pizzas
- Use fresh pita bread: Soft, fresh pitas yield the best texture.
- Don’t overload toppings: Keep it balanced to ensure crispiness.
- Pre-toast for extra crunch: Bake the pita for 3–4 minutes before adding toppings if you prefer a crispier base.
- Even cheese distribution: This ensures every bite is flavorful.
- Use a rack for crispier bottoms: If available, bake directly on an oven rack.
Flavor Variations
1. Classic Pepperoni
Tomato sauce, mozzarella, and pepperoni slices—simple and delicious.
2. Veggie Delight
Mushrooms, bell peppers, olives, onions, and tomatoes for a colorful, healthy option.
3. BBQ Chicken
Swap pizza sauce for BBQ sauce, add cooked chicken, red onions, and a mix of mozzarella and cheddar.
4. Margherita Style
Use fresh mozzarella, tomato slices, and basil for a light and fresh flavor.
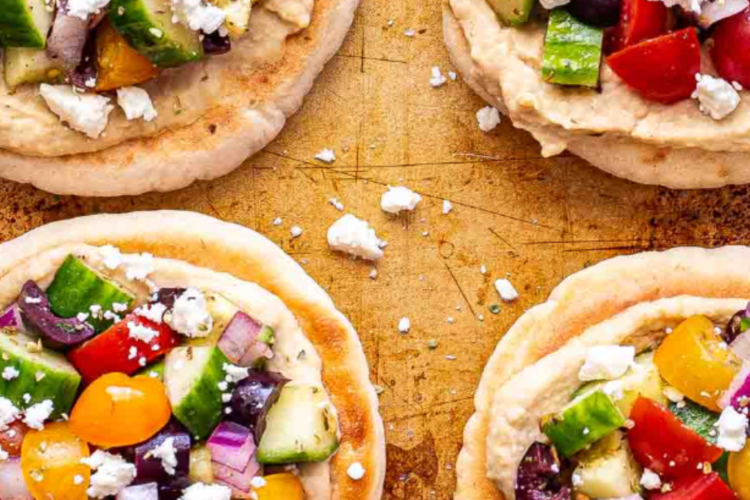
5. Mediterranean
Top with olives, feta cheese, spinach, and a drizzle of olive oil.
Make-Ahead and Storage
Mini pita pizzas are perfect for meal prep.
- Make ahead: Assemble the pizzas and store them in the fridge (uncooked) for up to 24 hours.
- Refrigeration: Store leftovers in an airtight container for up to 3 days.
- Freezing: Freeze assembled (unbaked) pizzas for up to 2 months. Bake directly from frozen, adding a few extra minutes.
Reheating Instructions
- Oven: Reheat at 180°C (350°F) for 5–7 minutes.
- Toaster oven: Great for small batches.
- Avoid microwave: It can make the pita soft instead of crispy.
Serving Suggestions
Mini pita pizzas can be served as:
- Party appetizers
- Kids’ lunchbox meals
- Quick dinners
- Game-day snacks
Pair them with:
- A fresh green salad
- Garlic dip or yogurt sauce
- A bowl of soup
Why You’ll Love This Recipe
Mini pita pizzas are:
- Quick (ready in under 20 minutes)
- Budget-friendly
- Highly customizable
- Perfect for all ages
- Great for using leftovers
They also encourage creativity—everyone can build their own pizza, making it a fun group activity.
Final Thoughts
Mini pita pizzas are proof that delicious food doesn’t have to be complicated. With just a few simple ingredients and minimal preparation, you can create a dish that’s both satisfying and versatile. Whether you’re cooking for yourself, your family, or a group of friends, these little pizzas are guaranteed to be a hit.
Once you try them, you’ll likely find yourself making them again and again—experimenting with new toppings and flavors each time.