Hot Chocolate Fudge: A Luxuriously Creamy Winter Treat (1000-Word Recipe)
When the weather cools and cozy evenings call for comfort, few treats deliver warmth and indulgence like Hot Chocolate Fudge. Think of everything you love about hot cocoa—the silky chocolate, the rich sweetness, the nostalgic aroma of winter—and now imagine it transformed into a soft, melt-in-your-mouth fudge. This recipe is a luscious blend of velvety chocolate, marshmallows, creamy condensed milk, and warm winter spices, bringing the essence of hot cocoa into a luscious block of candy. Whether you’re preparing a festive dessert tray, gifting treats for the holidays, or simply craving a decadent homemade sweet, this hot chocolate fudge promises a show-stopping bite every time.
This detailed recipe walks you through everything you need to know—from ingredients and equipment to step-by-step instructions, variations, storage tips, and even expert techniques to ensure your fudge is wonderfully smooth and never grainy. Let’s dive into the warm, chocolatey bliss.
Ingredients (Makes about 36 bite-size squares)
For the Fudge Base
- 3 cups semisweet chocolate chips
- 1 can (14 oz / 396 g) sweetened condensed milk
- 4 tablespoons unsalted butter
- 1 teaspoon pure vanilla extract
- 1/4 teaspoon salt
Hot Cocoa Flavoring Add-Ins
- 3 tablespoons hot cocoa mix (any brand you like)
- 1/2 teaspoon ground cinnamon (optional but enhances warmth)
- 1/4 teaspoon espresso powder (optional; deepens chocolate flavor)
Marshmallow Layer / Mix-ins
- 1 1/2 cups mini marshmallows
- Optional: 1/2 cup chopped chocolate chunks, peppermint pieces, or toasted nuts
For Topping
- Extra mini marshmallows
- Crushed candy canes (optional)
- A dusting of cocoa powder
Equipment
- Medium saucepan
- Rubber spatula
- 8×8-inch (20×20 cm) square pan
- Parchment paper
- Heat-proof bowl
- Knife for slicing
Step-by-Step Instructions
1. Prepare Your Pan
Line your baking pan with parchment paper, leaving extra hanging over the sides so you can lift the fudge out easily once it has set. Grease lightly with butter or nonstick spray to ensure the edges release smoothly. This step makes cutting clean squares effortless and ensures the fudge doesn’t stick to the surface.
2. Melt the Chocolate Base
In a medium saucepan over low to medium heat, combine the chocolate chips, condensed milk, butter, and salt. Stir continually to prevent scorching; chocolate burns quickly if left unattended. As the mixture begins to melt, it will transform into a thick, glossy, smooth consistency.
The condensed milk acts as a stabilizer, giving the fudge its signature creamy texture, while the butter helps enhance richness and improve slicing quality. Continue stirring until everything is completely smooth and no lumps remain.
3. Add the Hot Cocoa Flavor
Once the chocolate mixture is smooth, sprinkle in the hot cocoa mix, vanilla extract, cinnamon, and espresso powder if using. The hot cocoa mix infuses sweetness with that nostalgic flavor of a warm winter drink. Cinnamon adds a subtle warmth that deepens complexity, while espresso powder doesn’t make the fudge taste like coffee—it simply intensifies the chocolate.
Mix until the additions are fully incorporated and the mixture is silky and uniform.
4. Fold in the Marshmallows
Remove the saucepan from heat. Let it stand for 1–2 minutes so the fudge slightly cools—this ensures the marshmallows don’t completely melt but instead stay pillowy and visible throughout the fudge.
Stir in 1 1/2 cups mini marshmallows using a rubber spatula. If you enjoy extra texture, this is also the time to fold in chopped nuts, chocolate chunks, or peppermint pieces.
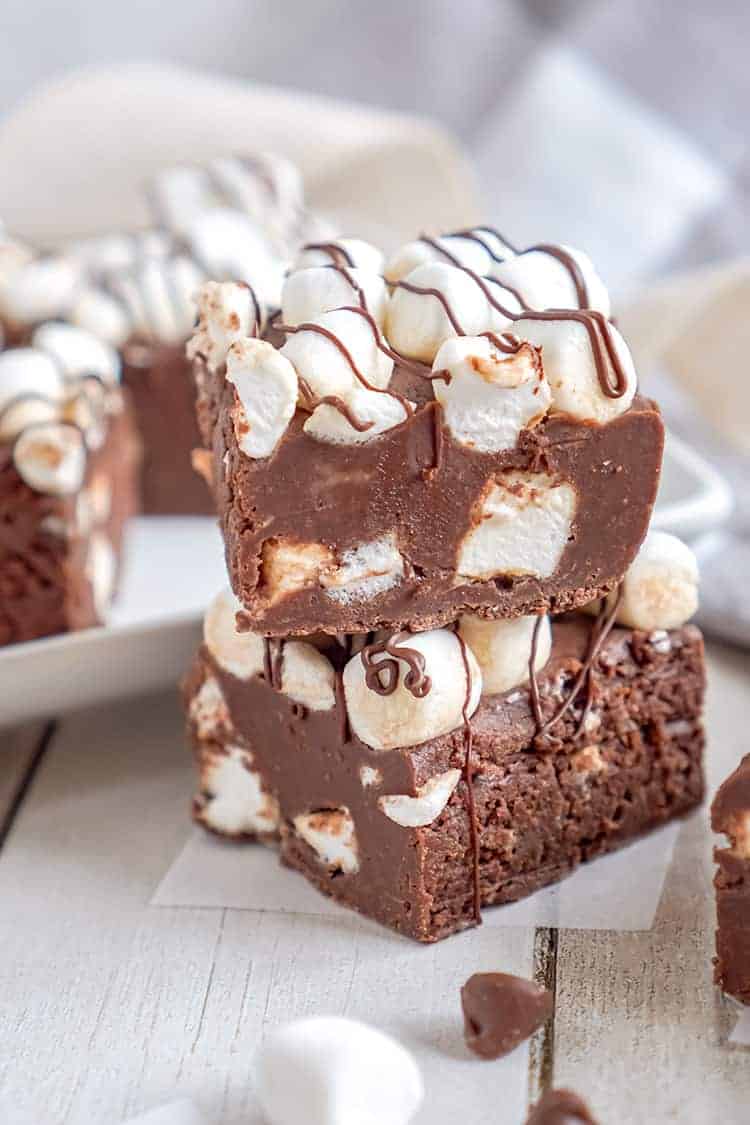
This step gives the fudge that true “hot cocoa” look, with marshmallow pockets that mimic marshmallows floating on top of a cup of warm chocolate.
5. Transfer and Smooth the Fudge
Pour the mixture into your prepared pan. Use the spatula to spread it evenly into all corners, smoothing out the top as much as possible. Tap the pan gently on the counter to help the fudge settle and remove any trapped air pockets.
6. Top the Fudge
Before it cools completely, sprinkle the top generously with extra mini marshmallows. You can also add crushed candy canes if preferred for a refreshing holiday twist. A light dusting of cocoa powder adds an elegant finish reminiscent of freshly topped hot chocolate.
7. Chill and Set
Place the pan in the refrigerator for at least 2–3 hours, or until completely firm. For best results, allow it to set overnight.
Once firm, remove the fudge by lifting the parchment paper. Transfer it to a cutting board and slice into neat squares using a sharp knife.
To get clean cuts:
- Warm your knife under hot water,
- Wipe dry,
- Slice in one downward motion (don’t saw through).
Expert Tips for Perfect Fudge
1. Low Heat is Key
Chocolate scorches easily. Keep your stovetop heat gentle and steady.
2. Do Not Rush the Cooling
Warm fudge is too soft to cut cleanly. A full chill ensures perfect squares.
3. Avoid Graininess
Continuous stirring prevents sugar crystals from forming, resulting in silky fudge.
4. Choose Quality Chocolate
Since chocolate is the hero of this recipe, better chocolate equals better fudge.
Flavor Variations
Peppermint Hot Cocoa Fudge
Add crushed peppermint candy into the fudge and sprinkle more on top. Use 1/4 tsp peppermint extract instead of vanilla.
Salted Caramel Hot Chocolate Fudge
Drizzle caramel sauce over the fudge before chilling. Add a pinch of flaky sea salt.
Mexican Hot Chocolate Fudge
Increase cinnamon to 1 teaspoon + add a pinch of cayenne pepper.
Mocha Hot Chocolate Fudge
Add 1 teaspoon espresso powder + 1 tablespoon instant coffee granules.
Storage Instructions
Room Temperature
Store in an airtight container for 4–5 days.
Refrigerator
Keeps well for up to 2 weeks.
Freezer
Wrap individual pieces tightly; freeze for up to 3 months. Thaw at room temperature before serving.
Serving Suggestions
- Enjoy with a mug of warm milk or coffee.
- Serve on a holiday dessert platter.
- Cut into tiny cubes and use as hot chocolate toppers.
- Gift in decorative holiday tins.
If