Easy Banana Sushi Rolls: A Fun & Healthy Snack Recipe
Banana Sushi Rolls are a playful, nutritious snack that turns simple ingredients into something visually appealing and irresistibly tasty. Inspired by the look of traditional sushi but completely sweet, these rolls are perfect for kids, adults, parties, lunchboxes, or even as a light dessert. They require no cooking, minimal preparation, and endless creativity. Whether you’re looking for a healthy treat, a fun activity with children, or a quick energy boost, banana sushi rolls deliver on all fronts.
This recipe focuses on balance: natural sweetness from bananas, healthy fats from nut butters, fiber from fruits, and optional crunch from seeds or granola. Best of all, you can customize them endlessly based on dietary needs, preferences, or what you already have in your pantry.
Why You’ll Love Banana Sushi Rolls
Banana sushi rolls are more than just cute—they’re genuinely good for you. Bananas are rich in potassium, vitamin B6, and natural carbohydrates that provide sustained energy. When paired with nut butter, you add protein and healthy fats that keep you full longer. Wrapping and topping them with fruits, seeds, or coconut increases fiber and micronutrients, making this snack both satisfying and nourishing.
They’re also:
- No-bake
- Kid-friendly
- Naturally sweet
- Ready in under 15 minutes
- Easily customizable
- Perfect for vegan and gluten-free diets
Ingredients (Serves 2–4)
Base Ingredients
- 2 large ripe bananas (firm but ripe)
- 4 tablespoons peanut butter, almond butter, or sunflower seed butter
- 2 large tortillas (whole wheat, plain, gluten-free, or spinach wraps)
Optional Toppings & Fillings
Choose a mix for flavor, texture, and color:
- Honey or maple syrup (for extra sweetness)
- Mini chocolate chips or dark chocolate shavings
- Shredded coconut (sweetened or unsweetened)
- Chopped strawberries
- Blueberries or raspberries
- Granola
- Chia seeds
- Flaxseeds
- Crushed nuts (almonds, peanuts, walnuts)
- Cinnamon or cocoa powder
Kitchen Tools Needed
- Sharp knife
- Cutting board
- Spoon or spatula
- Plate or serving board
Step-by-Step Instructions
Step 1: Prepare the Work Area
Lay a tortilla flat on a clean cutting board or plate. Make sure it’s soft and flexible—if it feels stiff, warm it slightly in the microwave for 10 seconds to prevent cracking.
Step 2: Spread the Nut Butter
Using a spoon or spatula, spread a thin, even layer of nut butter over the entire surface of the tortilla. Be generous but not excessive; too much filling can cause the roll to fall apart. If desired, drizzle a small amount of honey or maple syrup over the nut butter for added sweetness.
Step 3: Place the Banana
Peel one banana and place it horizontally near the bottom edge of the tortilla. If the banana is very thick, you can slice it lengthwise in half to make rolling easier and neater.
Step 4: Roll It Up
Carefully roll the tortilla tightly around the banana, just like rolling sushi or a wrap. Apply gentle pressure as you roll to keep everything compact. Make sure the seam is on the bottom so it stays closed.
Step 5: Slice into “Sushi” Pieces
Using a sharp knife, cut the rolled tortilla into bite-sized pieces, about 1 to 1½ inches thick. Wipe the knife between cuts for clean edges.
Step 6: Add Toppings
Arrange the banana sushi pieces cut-side up on a plate. Sprinkle your chosen toppings over the rolls—this is where creativity shines. You can also roll the entire wrap in toppings before slicing for full coverage.
Creative Flavor Variations
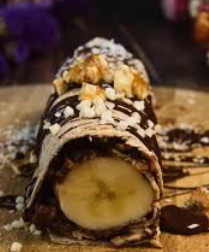
1. Chocolate Banana Sushi
- Use chocolate hazelnut spread instead of nut butter
- Add mini chocolate chips inside
- Dust lightly with cocoa powder
2. Berry Bliss Banana Rolls
- Add sliced strawberries or blueberries inside the tortilla
- Top with yogurt drizzle and crushed nuts
3. Tropical Banana Sushi
- Use coconut butter or almond butter
- Roll in shredded coconut
- Add diced mango or pineapple
4. Protein Power Rolls
- Use high-protein wraps
- Spread peanut butter mixed with protein powder
- Top with chia and flaxseeds
5. Cinnamon Apple Banana Rolls
- Add thin apple slices inside
- Sprinkle cinnamon and a pinch of nutmeg
- Drizzle with honey
Tips for Perfect Banana Sushi Rolls
- Choose firm bananas: Overripe bananas can become mushy and difficult to slice.
- Don’t overfill: Less is more when it comes to spreads and fillings.
- Use a sharp knife: This ensures clean slices and a professional look.
- Chill before slicing: Refrigerating the roll for 5–10 minutes helps it hold its shape.
- Get kids involved: Let them choose toppings and help assemble—it’s a great hands-on activity.
Serving Suggestions
Banana sushi rolls are incredibly versatile. Serve them:
- As a healthy afternoon snack
- In a kids’ lunchbox
- As a party platter alongside fruit skewers
- For breakfast on the go
- As a light dessert after dinner
You can pair them with yogurt dip, melted dark chocolate, or a fruit puree for dipping.
Storage & Make-Ahead Tips
Banana sushi rolls are best enjoyed fresh, but you can prepare them a few hours ahead:
- Store in an airtight container in the refrigerator
- Add a squeeze of lemon juice to banana slices to reduce browning
- Avoid adding wet toppings until just before serving
They will keep well for up to 24 hours, though texture is best within the first day.
Nutritional Benefits (Approximate per Serving)
- Rich in potassium and fiber
- Provides healthy fats and protein
- Naturally sweet with minimal added sugar
- Supports energy, digestion, and satiety
Final Thoughts
Easy Banana Sushi Rolls prove that healthy snacks don’t have to be boring. With just a few ingredients and a little creativity, you can transform a simple banana into a fun, colorful, and nutritious treat that appeals to all ages. Whether you stick to the classic version or experiment with bold flavors and toppings, this recipe is guaranteed to become a go-to favorite in your kitchen.