Red Velvet Oreo Cookies: A Decadent Twist on a Classic Favorite (1000 Words)
There’s something undeniably charming about red velvet desserts—their deep crimson color, velvety texture, and subtle cocoa flavor evoke elegance, nostalgia, and indulgence all at once. And when you pair that red velvet magic with the crunchy-creamy bliss of Oreo cookies, you get a treat that’s not only visually striking but irresistibly delicious. Red Velvet Oreo Cookies are the kind of dessert that turns ordinary moments into celebrations. They’re soft, chewy, chocolate-kissed, and generously studded with pieces of your favorite sandwich cookie. It’s the perfect dessert hybrid: part cookie, part cake, part Oreo wonderland.
Whether you’re baking for holidays, parties, or simply for joy, this recipe delivers cookies that feel bakery-worthy without requiring advanced baking skills. The dough comes together quickly, the ingredients are simple, and the results are spectacular. Each bite is filled with a delightful contrast—creamy Oreo white filling against plush red velvet dough, gentle cocoa warmth balanced by pops of sweetness, and a melt-in-your-mouth texture that keeps you reaching for just one more.
Let’s dive into how to create these stunning Red Velvet Oreo Cookies from scratch.
Why These Cookies Are So Special
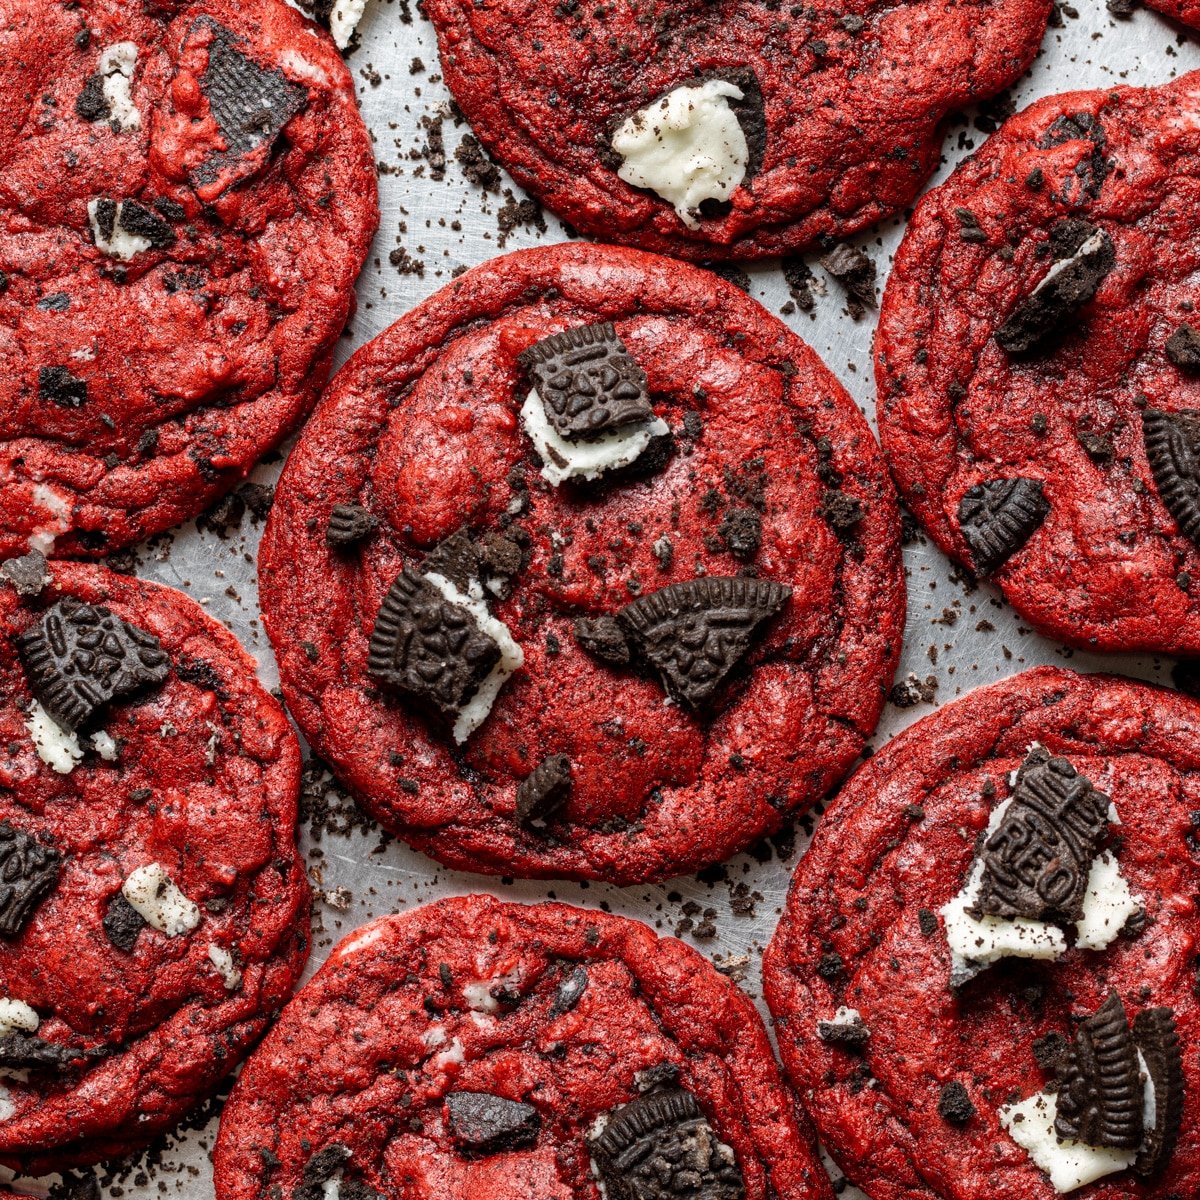
Red velvet desserts have always carried a kind of mystique: they’re not quite chocolate, not quite vanilla, yet they sit at the perfect intersection of both. The addition of Oreo cookies brings a playful crunch and a nostalgic flavor punch. As the cookies bake, some of the Oreos soften slightly while others remain firm, creating layers of texture in every bite. And thanks to the rich red coloring, these cookies steal the spotlight on any dessert platter—perfect for Valentine’s Day, Christmas, birthdays, potlucks, or cozy nights at home.
Ingredients for Red Velvet Oreo Cookies
Dry Ingredients:
- 2 ½ cups all-purpose flour
- ¼ cup unsweetened cocoa powder (natural, not Dutch-process)
- 1 teaspoon baking soda
- ¼ teaspoon salt
Wet Ingredients:
- ¾ cup unsalted butter, softened to room temperature
- 1 cup granulated sugar
- ½ cup packed brown sugar
- 2 large eggs
- 1 tablespoon vanilla extract
- 1 teaspoon white vinegar (classic red velvet signature)
- 1–2 teaspoons red gel food coloring (gel gives the best vibrant color)
Mix-ins:
- 12–14 Oreo cookies, roughly crushed (keep some bigger chunks!)
- Optional: 1 cup white chocolate chips for extra creaminess
How to Make Red Velvet Oreo Cookies
Making these cookies is as comforting as eating them. The steps are simple, but the flavors are bold and unforgettable.
Step 1: Prepare Your Dry Ingredients
Start by whisking together the flour, cocoa powder, baking soda, and salt in a medium bowl. This ensures your dry ingredients are evenly distributed and prevents clumps of cocoa or baking soda in the dough. Because red velvet has a subtle chocolate flavor, you don’t need a lot of cocoa—just enough to add depth and a hint of warmth.
Step 2: Cream the Butter and Sugars
In a large mixing bowl, beat the softened butter with both granulated and brown sugar until the mixture is fluffy and pale. This step is crucial because it incorporates air into the dough, helping your cookies bake up soft, puffy, and tender. Creaming the sugars for 2–3 minutes on medium speed is ideal. The brown sugar also adds moisture and a slight caramel note that enhances the red velvet flavor.
Step 3: Add Eggs, Vanilla, and Vinegar
Once the butter and sugar mixture is ready, add the eggs one at a time, beating well after each addition. Stir in the vanilla extract and vinegar. The vinegar is a hallmark ingredient in authentic red velvet—it reacts subtly with the baking soda to create a beautifully soft and tender crumb. Even though these are cookies, not cake, that trademark red velvet texture shines through.
Step 4: Add the Red Food Coloring
Mix in the red gel food coloring until the batter reaches a deep, rich crimson. Gel coloring works best because it produces vivid color without thinning the dough. Start with 1 teaspoon and add more if needed. Once the dry ingredients are added, it becomes harder to evenly color the dough, so this is the best moment to get the desired shade.
Step 5: Combine Wet and Dry Ingredients
Add your dry ingredient mixture to the wet ingredients gradually. Mix on low speed until just combined—overmixing will make the cookies tough. The dough will be thick, vibrant, and slightly sticky.
Step 6: Fold in the Oreos
Here comes the fun part: gently fold in the crushed Oreo pieces. Some bakers prefer to fold them in by hand to prevent the cookies from breaking too much, but you can use a stand mixer on low speed if you like. Keep some pieces larger to give the cookies those dramatic Oreo pockets. If you’re using white chocolate chips, fold them in now as well.
Step 7: Chill the Dough
This step is essential for thick, bakery-style cookies. Chill the dough for at least one hour—three hours or overnight is even better. Chilling helps the butter firm up, preventing the cookies from spreading too much in the oven. It also deepens the flavor and creates a chewier texture.
Step 8: Form the Cookies and Bake
Preheat your oven to 350°F (175°C). Line two baking sheets with parchment paper.
Scoop the chilled dough into balls about 2 tablespoons each. Press a few extra Oreo pieces on top for a beautiful, bakery-worthy finish. Space them 2 inches apart—they’ll spread slightly.
Bake for 10–12 minutes, or until the cookies look set around the edges but still soft in the center. They will continue to firm up as they cool, ensuring that perfect gooey-chewy combination.
Step 9: Cool and Serve
Allow the cookies to rest on the baking sheet for 5 minutes before transferring them to a cooling rack. This helps them stay thick and prevents breakage. Once cooled, the cookies will be soft, fudgy, and filled with delightful Oreo goodness.
Tips for the Best Red Velvet Oreo Cookies
- Use gel coloring for vibrant red cookies—liquid coloring often turns dough pink.
- Chill the dough for thick, tender cookies that don’t flatten in the oven.
- Don’t overbake—these cookies are meant to be soft and chewy.
- Add white chocolate chips if you want an extra creamy sweetness to pair with the Oreos.
- Press oreo pieces on top before baking for a bakery-style appearance.
Storing and Freezing
These cookies keep wonderfully:
- Room temperature: 4–5 days in an airtight container
- Refrigerator: up to 1 week
- Freezer (baked): up to 3 months
- Freezer (dough balls): scoop and freeze up to 2 months—bake from frozen, adding 1 extra minute
Final Thoughts
Red Velvet Oreo Cookies are more than just a sweet treat—they are a joyful blend of flavor, texture, and irresistible nostalgia. With their vibrant red color, velvety crumb, creamy Oreo bites, and soft-chewy center, they instantly become a crowd favorite. Whether you’re baking for loved ones or treating yourself, these cookies deliver warmth and delight in every bite.