🍰 The Best Basque Cheesecake Loaf
If you love cheesecake but want something simpler, creamier, and irresistibly caramelized on top, this Basque Cheesecake Loaf is about to become your favorite dessert. Inspired by the iconic burnt cheesecake from the Basque region of Spain, this loaf version delivers the same luscious custardy center and deeply golden exterior — but in a convenient loaf pan that’s perfect for slicing and sharing.
Unlike traditional cheesecakes that require water baths, careful baking, and slow cooling, this one is intentionally rustic. Cracks are welcome. A dark top is desirable. A slightly wobbly center? Perfect.
Let’s make the ultimate Basque Cheesecake Loaf — rich, creamy, deeply caramelized, and beautifully simple.
🛒 Ingredients (Serves 8–10)
- 500 g (18 oz) full-fat cream cheese, room temperature
- 150 g (¾ cup) granulated sugar
- 3 large eggs, room temperature
- 250 ml (1 cup) heavy cream (at least 35% fat)
- 1 teaspoon vanilla extract
- 1 tablespoon lemon juice (optional, for brightness)
- 20 g (2 tablespoons) all-purpose flour
- ¼ teaspoon fine salt
🧰 Equipment
- 9×5-inch loaf pan
- Parchment paper
- Mixing bowl
- Hand mixer or stand mixer
- Whisk
- Spatula
🔥 Step 1: Prepare the Pan
Preheat your oven to 220°C (425°F). Basque cheesecake needs high heat to achieve its signature caramelized top.
Line your loaf pan with parchment paper. Let the paper hang over the sides — this rustic overhang creates the classic wrinkled edges and makes removal easy.
Lightly grease the parchment to prevent sticking.
🧀 Step 2: Cream the Cheese and Sugar
In a large mixing bowl, beat the room-temperature cream cheese until completely smooth. This step is crucial — no lumps!
Add the sugar and continue beating until the mixture is silky and creamy, about 2–3 minutes.
Tip: Scrape down the sides of the bowl often to ensure even mixing.
🥚 Step 3: Add the Eggs
Add the eggs one at a time, mixing on low speed after each addition. Do not overmix — too much air can cause cracks or puffing.
Once incorporated, the batter should look glossy and smooth.
🥛 Step 4: Add Cream and Flavor
Pour in the heavy cream slowly while mixing gently. Add the vanilla extract and lemon juice (if using).
The batter will become loose and silky — almost like thick custard.
🌾 Step 5: Add Flour and Salt
Sift in the flour and add the salt. Mix just until combined.
The flour stabilizes the cheesecake slightly while maintaining its creamy interior.
🫗 Step 6: Pour and Tap
Pour the batter into your prepared loaf pan.
Tap the pan gently on the counter several times to release air bubbles.
The batter should reach about ¾ up the sides of the pan.
🔥 Step 7: Bake to Perfection
Bake at 220°C (425°F) for 30–40 minutes.
What you’re looking for:
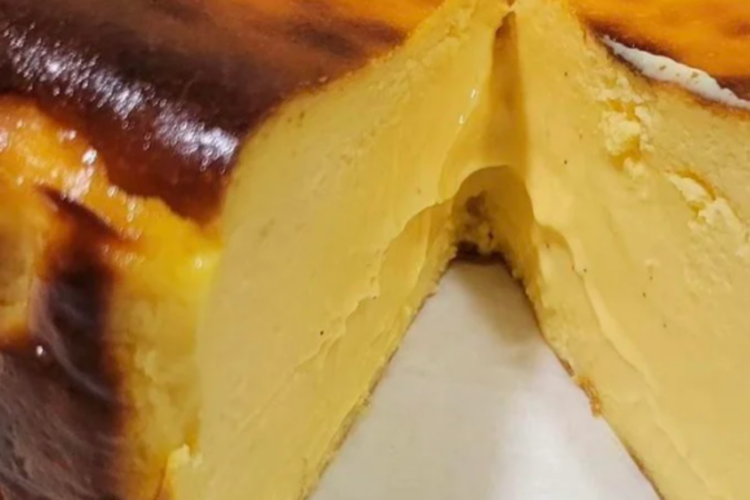
✔ Deep golden brown top
✔ Almost burnt appearance (this is correct!)
✔ Center still slightly jiggly
The edges will be set, but the middle should wobble when gently shaken.
If the top darkens too quickly, resist the urge to lower the temperature — the dark color is part of the flavor.
❄ Step 8: Cool Properly
Remove from the oven and let cool at room temperature for 1 hour.
The center will sink slightly — that’s normal.
Then refrigerate for at least 4 hours, preferably overnight. This allows the custard texture to set beautifully.
✨ Texture Guide
- Warm (1 hour after baking): Ultra soft, almost molten center
- Chilled (overnight): Creamy, dense, silky texture
- Room temp (20 minutes before serving): Perfect balance
🔪 Serving Tips
Lift the cheesecake out using the parchment overhang.
Use a sharp knife dipped in hot water for clean slices.
Serve:
- Plain (the best way)
- With fresh berries
- With a drizzle of honey
- With a light dusting of powdered sugar
🧈 Why This Recipe Works
High temperature creates caramelization through the Maillard reaction.
The heavy cream provides luxurious richness.
Minimal flour keeps it creamy but stable.
No water bath means simpler baking and rustic charm.
💡 Pro Tips for Success
✔ Always use full-fat cream cheese
✔ Ingredients must be room temperature
✔ Do not overbake — jiggle is key
✔ Chill thoroughly before slicing
✔ Embrace the dark top — it adds flavor
🍫 Variations
Chocolate Basque Loaf
Add 100 g melted dark chocolate to the batter.
Espresso Version
Add 1 tablespoon instant espresso powder.
Citrus Twist
Add orange zest for a bright aroma.
Salted Caramel Swirl
Swirl thick caramel sauce into the batter before baking.
🥄 Storage
Refrigerate in an airtight container for up to 4 days.
It actually tastes better on day two.
You can freeze slices individually for up to 1 month. Thaw overnight in the refrigerator.
❤️ What Makes Basque Cheesecake Special?
Originating in San Sebastián, this style of cheesecake is crustless, intentionally “burnt,” and creamy in the center. Unlike dense New York cheesecake, it’s lighter in structure yet deeply rich in flavor.
The caramelized top balances the sweet interior with subtle bitterness, creating complexity in every bite.
🧁 Common Mistakes to Avoid
❌ Using cold cream cheese (causes lumps)
❌ Baking too long (results in dry texture)
❌ Under-mixing sugar and cheese
❌ Opening oven too early
❌ Using low-fat dairy
🌟 Final Thoughts
The Best Basque Cheesecake Loaf is proof that elegant desserts don’t need complicated techniques. With just a handful of ingredients and high heat, you get a dessert that looks rustic but tastes refined.
Creamy center. Deeply caramelized top. Perfect slices. Minimal effort.
Whether served at a dinner party or enjoyed quietly with coffee, this loaf-style Basque cheesecake is unforgettable.
Bake it once — and it will become your signature dessert.
Enjoy every creamy, caramelized bite. 🍰✨