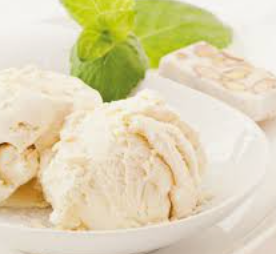
The Best Homemade Vanilla Ice Cream EVER
Creamy, Rich, Classic, and Absolutely Unforgettable
Why This Vanilla Ice Cream Is Truly the Best
Vanilla ice cream gets a bad rap for being “plain,” but when it’s done right, it’s anything but boring. The secret is quality ingredients, proper technique, and patience. This recipe uses a French-style custard base made with egg yolks, which gives the ice cream:
- A silky, spoon-coating texture
- Incredible richness without heaviness
- A deep, natural vanilla flavor that lingers
This is the vanilla ice cream you serve on its own, not just as a sidekick to pie.
Ingredients (Serves about 6–8)
Dairy Base
- 2 cups (480 ml) heavy cream (minimum 35% fat)
- 1 cup (240 ml) whole milk
- ¾ cup (150 g) granulated sugar, divided
- ¼ teaspoon fine sea salt
Custard & Flavor
- 5 large egg yolks, room temperature
- 1 vanilla bean, split and scraped
(or 2½ teaspoons pure vanilla extract if no bean)
Ingredient Tip:
Use the best vanilla you can afford. Madagascar vanilla gives a classic, creamy flavor, while Tahitian vanilla is more floral and aromatic.
Equipment You’ll Need
- Medium saucepan
- Whisk
- Heatproof bowl
- Fine-mesh strainer
- Silicone spatula
- Ice bath (large bowl + ice + water)
- Ice cream maker
- Airtight freezer container
Step 1: Infuse the Milk and Cream
In a medium saucepan, combine:
- Heavy cream
- Whole milk
- Half of the sugar (⅜ cup)
- Salt
- Vanilla bean seeds and the empty pod
Set the pan over medium heat and warm gently, stirring occasionally. Do not boil. You want the mixture hot and steamy, just when small bubbles form around the edges.
Once hot, remove from the heat, cover, and let it steep for 20–30 minutes. This step is crucial—it allows the vanilla to fully bloom and perfume the dairy.
Step 2: Whisk the Egg Yolks
In a heatproof bowl, whisk together:
- Egg yolks
- Remaining sugar (⅜ cup)
Whisk until the mixture becomes pale, thick, and slightly creamy. This dissolves the sugar and helps create a smooth custard.
Step 3: Temper the Eggs (Don’t Skip!)
Slowly pour about ½ cup of the warm milk mixture into the egg yolks while whisking constantly. This gently raises the temperature of the eggs so they don’t scramble.
Once tempered, pour the egg mixture back into the saucepan with the remaining dairy.
Step 4: Cook the Custard
Place the saucepan back over low to medium-low heat. Stir constantly with a silicone spatula, scraping the bottom and sides.
Cook until the custard thickens and reaches 170–175°F (77–80°C), or until it coats the back of a spoon. When you draw a finger through it, the line should stay clean.
⚠️ Do not boil—boiling will curdle the eggs.
Step 5: Strain and Chill
Immediately strain the custard through a fine-mesh sieve into a clean bowl to remove:
- Vanilla pod
- Any cooked egg bits
Place the bowl into an ice bath and stir until the custard cools to room temperature.
Once cooled, cover and refrigerate for at least 4 hours, preferably overnight. This resting time improves flavor and texture dramatically.
Step 6: Churn to Creamy Perfection
Pour the chilled custard into your ice cream maker and churn according to the manufacturer’s instructions, usually 20–25 minutes.
The ice cream should look like soft-serve and double slightly in volume.
Step 7: Ripen in the Freezer
Transfer the churned ice cream to an airtight container. Press parchment paper directly onto the surface to prevent ice crystals.
Freeze for at least 4 hours to firm up.
How to Serve Like a Pro
Before scooping, let the ice cream sit at room temperature for 5 minutes. This softens it just enough for perfect, creamy scoops.
Serve it:
- Plain (trust me, it’s enough)
- With warm brownies or apple pie
- With fresh berries and a drizzle of honey
- Sprinkled with flaky sea salt for contrast
Pro Tips for Next-Level Vanilla Ice Cream
1. Use Egg Yolks Only
Egg whites add water. Yolks add richness and stability.
2. Chill Everything
Cold base = smoother churn = smaller ice crystals.
3. Don’t Skimp on Fat
Low-fat dairy = icy texture. This is dessert, not a diet food 😉
4. Add Vanilla Twice (Optional)
For extra punch, stir in ½ teaspoon vanilla extract after churning.
Flavor Variations (Still Vanilla at Heart)
- Vanilla Bean Speckled: Add extra seeds from a second pod
- Vanilla Honey: Replace ¼ cup sugar with mild honey
- Vanilla Bourbon: Add 1 tablespoon bourbon after churning
- Vanilla Salted Caramel Swirl: Fold in caramel sauce during the last minute of churning
Storage & Shelf Life
Homemade ice cream is best within 7–10 days. After that, it’s still safe to eat, but the texture may lose some magic.
Always store it tightly sealed and away from strong freezer odors.
Final Thoughts
This isn’t just vanilla ice cream—it’s the gold standard. It’s rich without being heavy, sweet without being cloying, and bursting with real vanilla flavor. Once you make this at home, store-bought versions won’t stand a chance.