Strawberry Cheesecake Mochi (Soft, Creamy & Fruity Delight)
🍡 Introduction
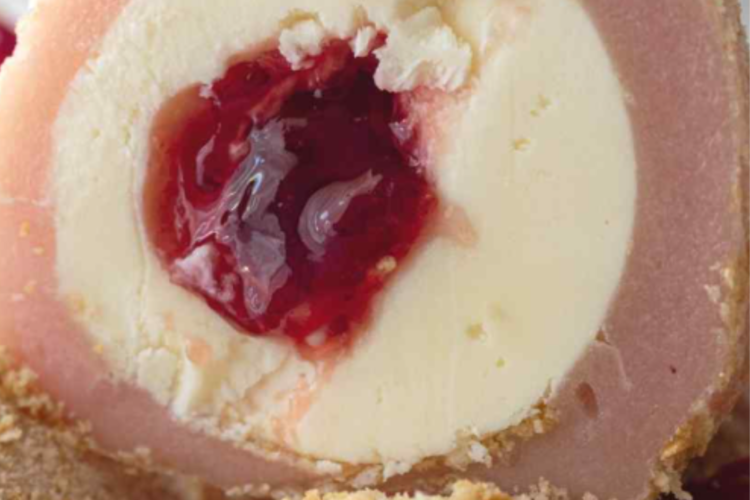
Strawberry Cheesecake Mochi is a beautiful fusion dessert that combines the chewy texture of mochi with the luscious richness of cheesecake and the bright sweetness of strawberries. Inspired by traditional Japanese daifuku (mochi filled with sweet fillings), this modern twist transforms it into a bite-sized indulgence that feels both elegant and comforting.
Each piece features a soft, pillowy mochi exterior wrapped around a creamy cheesecake center, often paired with fresh strawberries or strawberry jam. The contrast of textures—chewy, creamy, and slightly fruity—makes every bite exciting.
Perfect for tea time, parties, or special occasions, these mochi are naturally gluten-free and can be made ahead for convenience.
🛒 Ingredients
For the Cheesecake Filling:
- 200 g cream cheese (softened)
- ¼ cup (50 g) granulated sugar
- ½ teaspoon vanilla extract
- ½ cup (120 ml) heavy cream (whipped to soft peaks)
For the Strawberry Center:
- 6–8 fresh strawberries (hulled and halved)
or - ½ cup strawberry jam (thick)
For the Mochi Dough:
- 1 cup (130 g) glutinous rice flour (sweet rice flour)
- ¾ cup (150 g) sugar
- 1 cup (240 ml) water or milk
- 1–2 drops pink food coloring (optional)
For Dusting:
- Cornstarch or potato starch
🍳 Equipment Needed
- Mixing bowls
- Electric mixer or whisk
- Microwave-safe bowl or steamer
- Spatula
- Rolling pin
- Plastic wrap
- Baking tray
👩🍳 Step-by-Step Instructions
Step 1: Prepare the Cheesecake Filling
In a bowl, beat the softened cream cheese with sugar until smooth and creamy. Add the vanilla extract and mix well.
In a separate bowl, whip the heavy cream until soft peaks form. Gently fold the whipped cream into the cream cheese mixture to create a light, fluffy cheesecake filling.
Transfer the mixture into small portions (about 1 tablespoon each) onto a lined tray. Freeze for at least 1–2 hours until firm.
Step 2: Prepare the Strawberry Centers
If using fresh strawberries, make sure they are dry and cut into small halves or quarters depending on size.
If using jam, scoop small portions and freeze them briefly so they are easier to handle.
For a layered effect, you can press a piece of strawberry into each cheesecake portion before freezing completely.
Step 3: Make the Mochi Dough
In a microwave-safe bowl, combine:
- Glutinous rice flour
- Sugar
- Water or milk
Mix until smooth and lump-free. Add a drop or two of pink food coloring if desired for a strawberry-inspired look.
Cover loosely with plastic wrap and microwave for 1 minute. Stir, then microwave again for another minute. Stir again and microwave for a final minute until the dough becomes thick, sticky, and slightly translucent.
Let it cool slightly until warm but manageable.
Step 4: Roll Out the Mochi
Dust your work surface generously with cornstarch. Transfer the mochi dough onto the surface and dust the top as well.
Using a rolling pin, roll the dough to about ¼ inch thickness. Try to keep it even.
Allow the dough to cool completely before cutting.
Step 5: Cut the Mochi Circles
Use a round cutter (about 3–4 inches in diameter) to cut circles from the dough. These will wrap your filling.
Keep them lightly dusted to prevent sticking.
Step 6: Assemble the Mochi
Take one mochi circle and place it in your palm.
Add one frozen cheesecake portion in the center. If using strawberries, place a piece on top or inside the filling.
Carefully stretch the mochi edges around the filling, pinching them together to seal. Try to keep the surface smooth and avoid tearing.
Wrap each mochi ball in plastic wrap to help maintain its shape.
Step 7: Chill and Set
Place the assembled mochi in the refrigerator for about 30 minutes or in the freezer for 15 minutes before serving.
This helps them firm up and improves texture.
🍽️ Serving Suggestions
- Serve slightly chilled for the best texture
- Dust lightly with powdered sugar or cornstarch
- Pair with green tea, jasmine tea, or coffee
- Garnish with fresh strawberry slices or mint leaves
💡 Tips for Success
- Keep fillings cold: Frozen filling makes assembly much easier
- Work quickly: Mochi becomes sticky and harder to handle as it cools
- Use enough starch: Prevents sticking without affecting flavor
- Don’t overfill: Too much filling can cause tearing
- Seal היט היט: Make sure edges are well sealed to avoid leaks
🔄 Variations
🍫 Strawberry Chocolate Cheesecake Mochi
Add mini chocolate chips to the cheesecake filling or drizzle chocolate inside.
🍓 Double Strawberry Mochi
Mix strawberry puree into the cheesecake filling for extra fruit flavor.
🥥 Coconut Strawberry Mochi
Use coconut milk in the dough and roll finished mochi in shredded coconut.
🍰 No-Bake Cheesecake Mochi
Add crushed graham crackers to the filling for a true cheesecake vibe.
🧠 Why This Recipe Works
Glutinous rice flour creates the signature chewy texture of mochi, while the cheesecake filling adds creaminess and richness. Freezing the filling ensures it stays firm during assembly, making the process easier and cleaner.
The balance of flavors—sweet, slightly tangy cream cheese and fresh strawberries—creates a dessert that feels light yet indulgent.
❤️ Final Thoughts
Strawberry Cheesecake Mochi is a delightful fusion dessert that brings together the best of two worlds. It’s soft, creamy, fruity, and just the right amount of sweet. While it may take a bit of practice to perfect the wrapping technique, the results are well worth the effort.
Once you’ve mastered this version, you can experiment with endless variations—from mango cheesecake to matcha cream fillings.
Whether you’re making them for guests or treating yourself, these little mochi bites are guaranteed to impress.