🍫 Chocolate Mochi Ice Cream (Chewy, Creamy & Decadent)
🍨 Introduction
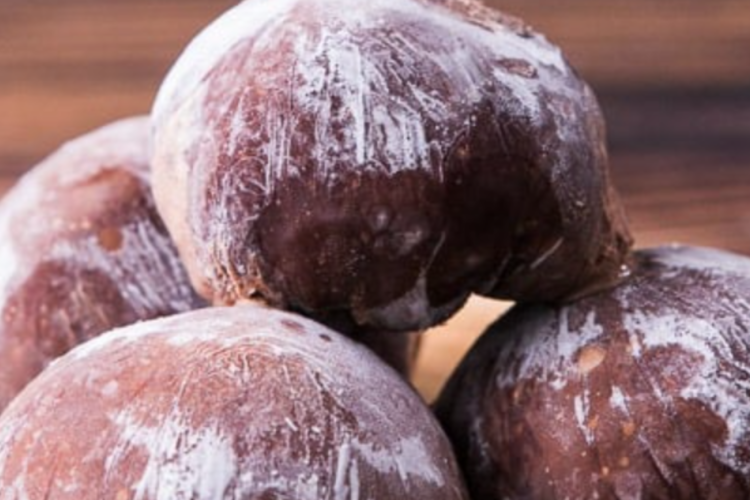
Chocolate Mochi Ice Cream is a delightful treat that combines two beloved textures: the soft, stretchy chew of mochi and the smooth, cold creaminess of ice cream. Originally inspired by Japanese daifuku (sweet rice cakes filled with red bean paste), mochi ice cream has become a global favorite, with chocolate being one of the most popular flavors.
This homemade version allows you to control the quality of ingredients and customize flavors. While it may seem intimidating at first, the process is surprisingly simple once you break it down. With a little patience and preparation, you’ll create a dessert that looks impressive and tastes even better.
🛒 Ingredients
For the Chocolate Ice Cream Filling:
- 2 cups (480 ml) heavy cream
- 1 cup (240 ml) whole milk
- ¾ cup (150 g) granulated sugar
- ½ cup (50 g) unsweetened cocoa powder
- 4 oz (115 g) dark chocolate (finely chopped)
- 4 large egg yolks
- 1 teaspoon vanilla extract
- Pinch of salt
For the Mochi Dough:
- 1 cup (130 g) glutinous rice flour (sweet rice flour)
- ¾ cup (150 g) sugar
- 1 cup (240 ml) water
- 2 tablespoons cocoa powder (for chocolate mochi layer)
For Dusting:
- Cornstarch or potato starch (to prevent sticking)
🍳 Equipment Needed
- Mixing bowls
- Saucepan
- Whisk
- Ice cream scoop or spoon
- Baking tray
- Plastic wrap
- Microwave-safe bowl (or steamer)
- Rolling pin
- Round cutter (or glass)
👩🍳 Step-by-Step Instructions
Step 1: Make the Chocolate Ice Cream
In a medium saucepan, whisk together the milk, cream, cocoa powder, and half of the sugar. Heat over medium heat until it begins to steam (do not boil).
In a separate bowl, whisk the egg yolks with the remaining sugar until pale and slightly thickened. Slowly pour the warm milk mixture into the yolks while whisking continuously to temper them.
Return the mixture to the saucepan and cook over low heat, stirring constantly, until it thickens enough to coat the back of a spoon. Remove from heat and stir in the chopped dark chocolate, vanilla extract, and salt until smooth.
Strain the mixture for extra smoothness, then let it cool completely. Refrigerate for at least 4 hours or overnight.
Once chilled, churn the mixture in an ice cream maker according to the manufacturer’s instructions. If you don’t have one, freeze and stir every 30 minutes until creamy.
Scoop small balls (about 1–2 tablespoons each) onto a lined tray and freeze until solid (at least 2–3 hours).
Step 2: Prepare the Mochi Dough
In a microwave-safe bowl, mix:
- Glutinous rice flour
- Sugar
- Cocoa powder
- Water
Whisk until smooth and lump-free.
Cover loosely with plastic wrap and microwave for 1 minute. Stir, then microwave again for another minute. Repeat one more time until the dough becomes thick, sticky, and slightly glossy.
Let the dough cool slightly so it’s safe to handle but still warm and pliable.
Step 3: Roll Out the Mochi
Dust a clean surface generously with cornstarch. Transfer the mochi dough onto the surface and dust the top as well.
Using a rolling pin, roll the dough to about ¼ inch (0.5 cm) thickness. Try to keep it even.
Let it cool completely before cutting.
Step 4: Cut and Shape
Use a round cutter (about 3–4 inches wide) to cut circles from the dough. Each circle will wrap one scoop of ice cream.
If the dough becomes too sticky, dust with more cornstarch.
Step 5: Assemble the Mochi Ice Cream
Take one frozen ice cream ball and place it in the center of a mochi circle.
Quickly stretch the edges of the mochi around the ice cream, pinching them together at the top to seal. Work fast so the ice cream doesn’t melt.
Wrap each piece in plastic wrap and place it seam-side down in the freezer.
Repeat with remaining pieces.
Step 6: Freeze and Set
Freeze the assembled mochi ice cream for at least 2 hours before serving. This helps them firm up and hold their shape.
🍽️ Serving Suggestions
- Let sit at room temperature for 2–3 minutes before eating for the perfect texture
- Serve with fresh berries or a drizzle of chocolate sauce
- Pair with coffee, espresso, or green tea
- Dust lightly with cocoa powder for a refined finish
💡 Tips for Success
- Work quickly when assembling to prevent melting
- Keep everything cold—you can chill your hands or tools if needed
- Use plenty of starch to avoid sticking
- Don’t overfill the mochi or it may tear
- Smooth sealing ensures a nice round shape
🔄 Variations
🍓 Chocolate Strawberry Mochi
Use strawberry ice cream inside chocolate mochi for a fruity contrast.
🥥 Chocolate Coconut Mochi
Replace some milk with coconut milk for a tropical twist.
🍫 Double Chocolate Mochi
Add chocolate chips to the ice cream or drizzle melted chocolate inside before sealing.
☕ Mocha Mochi Ice Cream
Add espresso powder to the chocolate ice cream base for a coffee kick.
🧠 Why This Recipe Works
The combination of glutinous rice flour and water creates a stretchy, elastic dough that remains soft even when frozen. Cocoa powder adds a chocolate flavor without compromising the structure. The ice cream filling is rich and creamy thanks to the custard base, which prevents iciness and enhances flavor.
The contrast between the cold, creamy center and the chewy outer layer is what makes mochi ice cream so unique and satisfying.
❤️ Final Thoughts
Chocolate Mochi Ice Cream is a dessert that brings together texture, flavor, and creativity. While it requires a bit of preparation, the end result is absolutely worth it. Each bite offers a perfect balance of chewiness and creaminess, with deep chocolate flavor throughout.
Once you master this recipe, you can experiment endlessly with different fillings and coatings. It’s a fun project for weekends, special occasions, or whenever you’re craving something truly special.