Basque Burnt Cheesecake Recipe (Creamy, Caramelized & Foolproof)
Introduction
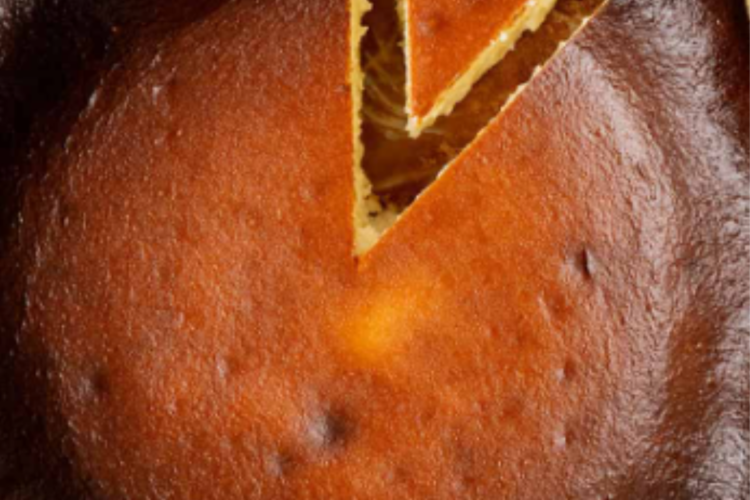
Basque Burnt Cheesecake, also known as “tarta de queso,” originated in the Basque region of Spain and became world-famous thanks to the restaurant La Viña in San Sebastián. Unlike traditional cheesecakes, this version is intentionally baked at a high temperature to achieve a deeply caramelized, almost burnt exterior while keeping the inside soft, custardy, and incredibly creamy.
What makes this cheesecake truly special is its simplicity. There’s no crust, no water bath, and no complicated techniques. Instead, you get a dessert that looks rustic yet tastes luxurious—perfect for impressing guests or indulging yourself.
Ingredients
Main Ingredients:
- 600 g (about 2 1/2 cups) cream cheese, softened
- 200 g (1 cup) granulated sugar
- 4 large eggs (room temperature)
- 300 ml (1 1/4 cups) heavy cream
- 1 tablespoon vanilla extract
- 1/4 teaspoon salt
- 30 g (1/4 cup) all-purpose flour
Optional Add-ins:
- Zest of 1 lemon or orange
- 1 teaspoon espresso powder (for depth)
- A splash of rum or liqueur
Equipment Needed
- 20 cm (8-inch) springform pan
- Parchment paper (at least 2 large sheets)
- Mixing bowls
- Whisk or electric mixer
- Spatula
Instructions
Step 1: Prepare the Pan
Preheat your oven to 220°C (425°F). This high temperature is essential for creating the signature burnt top.
Line your springform pan with parchment paper, allowing it to extend well above the edges (at least 5 cm). Don’t worry about making it neat—the rustic folds give the cheesecake its classic look.
Step 2: Soften the Cream Cheese
Ensure your cream cheese is fully softened at room temperature. This helps prevent lumps and ensures a silky batter.
In a large bowl, beat the cream cheese until smooth and creamy.
Step 3: Add Sugar
Add the sugar and mix until fully incorporated. The mixture should become glossy and slightly lighter in texture.
Step 4: Incorporate Eggs
Add the eggs one at a time, mixing well after each addition. This gradual process helps create a smooth, emulsified batter.
Step 5: Add Cream and Flavorings
Pour in the heavy cream and mix gently until smooth. Add vanilla extract and salt, and stir to combine.
If you’re using citrus zest or other flavorings, add them at this stage.
Step 6: Add Flour
Sift in the flour and mix just until combined. The flour helps stabilize the cheesecake while keeping it soft and creamy.
Step 7: Pour Batter into Pan
Pour the batter into the prepared pan. Tap the pan gently on the counter to release any air bubbles.
Step 8: Bake
Place the cheesecake in the center of the oven and bake for 40–50 minutes.
You’re looking for:
- A deeply browned, almost burnt top
- A puffed, set outer edge
- A slightly jiggly center
Don’t be afraid of the dark color—that’s what gives this cheesecake its signature flavor.
Step 9: Cool
Remove the cheesecake from the oven and let it cool at room temperature. It will deflate slightly as it cools—this is completely normal.
For best results, refrigerate for at least 4 hours or overnight. This allows the texture to fully set and develop its creamy consistency.
Serving Suggestions
Serve Basque Burnt Cheesecake slightly chilled or at room temperature. It’s delicious on its own, but you can enhance it with:
- Fresh berries (strawberries, raspberries, blueberries)
- A drizzle of honey or caramel sauce
- A dusting of powdered sugar
- Whipped cream on the side
Each slice should be creamy, rich, and melt-in-your-mouth tender.
Texture Guide
One of the best things about this cheesecake is that you can adjust the texture based on baking time:
- Shorter baking time: Softer, custard-like center
- Longer baking time: Firmer, more traditional cheesecake texture
Both versions are delicious—it just depends on your preference.
Tips for Success
1. Use Room Temperature Ingredients
This ensures a smooth batter and prevents lumps.
2. Don’t Overmix
Mix just until ingredients are combined to avoid incorporating too much air.
3. Embrace the Burn
The dark top is intentional—it adds a slightly bitter caramel flavor that balances the sweetness.
4. No Water Bath Needed
Unlike classic cheesecakes, this recipe is designed to bake without one.
Common Mistakes to Avoid
- Underbaking: The center should jiggle slightly but not be liquid
- Overbaking: Can lead to a dry texture
- Cold ingredients: May result in a lumpy batter
- Skipping parchment paper: The cheesecake can stick and lose its shape
Variations
🍫 Chocolate Basque Cheesecake
Add 100 g melted dark chocolate to the batter for a rich twist.
🍋 Citrus Version
Add lemon or orange zest for a refreshing flavor.
☕ Coffee Version
Mix in espresso powder for a subtle bitterness that complements the caramelized top.
Storage
- Refrigerator: Store in an airtight container for up to 5 days
- Freezer: Wrap slices individually and freeze for up to 2 months
To serve after freezing, thaw in the refrigerator overnight.
Why You’ll Love This Recipe
This Basque Burnt Cheesecake is:
- Simple yet impressive
- Rich, creamy, and deeply flavorful
- Naturally rustic—no need for perfection
- Perfect for any occasion
Final Thoughts
Basque Burnt Cheesecake proves that sometimes imperfection creates something extraordinary. Its cracked surface, dark top, and creamy center make it unique among desserts. It’s a celebration of bold flavors and simple techniques, resulting in a cheesecake that feels both comforting and gourmet.
Whether you’re a beginner baker or an experienced one, this recipe is approachable and rewarding. Once you taste that contrast between the caramelized exterior and the silky interior, you’ll understand why it has become a global favorite.